The following article describes running a 3 nodes Aerospike cluster in Docker. After configuration and running the cluster we will then review the distribution of secondary partitions across the cluster. To acheive all of this we use a feature of Aerospike known as rack aware. Essentially creating different hardware groups with clear segregation between these various groups. In our example case these groups are simplified as group1 and group2. In reality , they could easily be cloud availability zones and if using on premise, the hardware segregation might be different physical racks or data centres.
Step 1: Creating our Docker cluster
The following assumes you have docker installed and have some understanding how docker works but not essential.
Create 3 directories
mkdir aerospike{1..3}Inside each directory place your features file if using an enterprise license alongside an aerospike.conf file. So all 3 directories you should have something like this:
-rw-r--r--@ 1 nareshmaharaj  staff   969 30 Jul 13:24 features.conf
-rw-r--r--  1 nareshmaharaj  staff  1698 31 Jul 11:13 aerospike.conf
Edit the aerospike.conf file adding the following configuration.
# Aerospike database configuration file.# This stanza must come first.
service {
user root
group root
paxos-single-replica-limit 1 # Number of nodes where the replica count is automatically reduced to 1.
pidfile /var/run/aerospike/asd.pid
# service-threads 8 # default is 5 x cpus
# transaction-queues 8 # obsolete as of 4.7
# transaction-threads-per-queue 4 #obsolete as of 4.7
proto-fd-max 15000
feature-key-file /opt/aerospike/etc/features.conf
}logging { # Log file must be an absolute path.
file /var/log/aerospike/aerospike.log {
context any info
} # Send log messages to stdout
console {
context any info
}
}network {
service {
address any
port 3000 # Uncomment the following to set the `access-address` parameter to the
# IP address of the Docker host. This will the allow the server to correctly
# publish the address which applications and other nodes in the cluster to
# use when addressing this node.
# access-address <IPADDR>
} heartbeat { address any
# mesh is used for environments that do not support multicast
mode mesh
port 3002 # use asinfo -v 'tip:host=<ADDR>;port=3002' to inform cluster of
# other mesh nodes interval 150
timeout 10
} fabric {
address any
port 3001
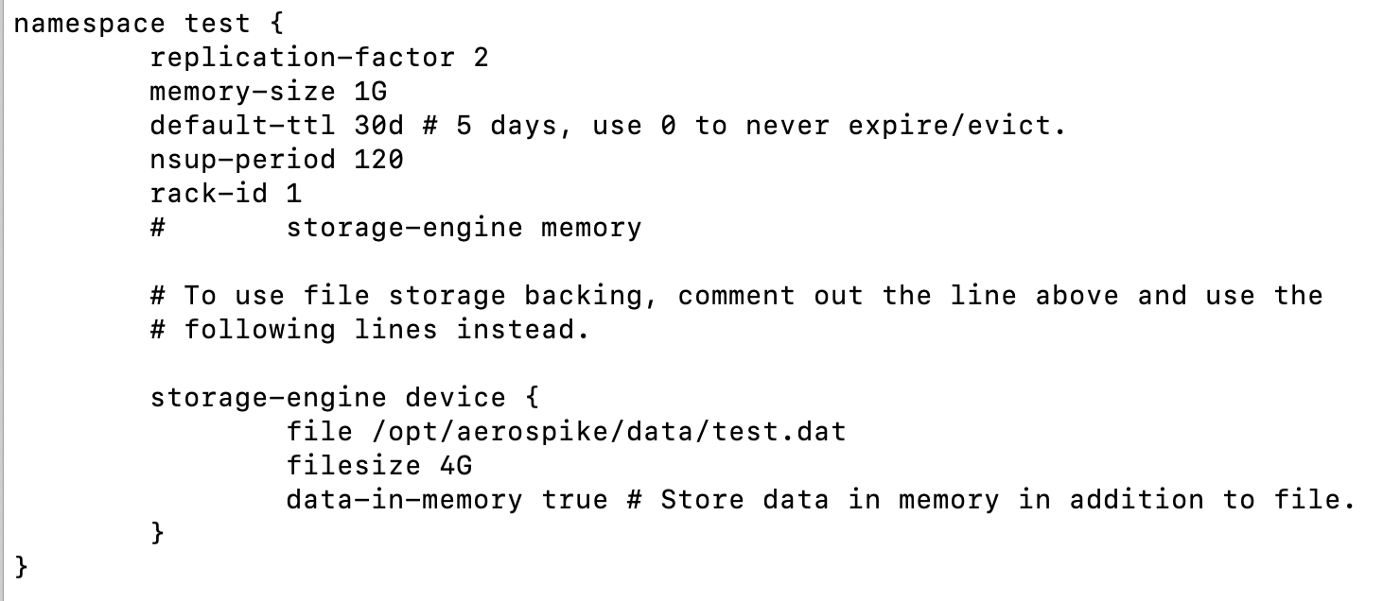
}}namespace test {
replication-factor 2
memory-size 1G
default-ttl 30d # 5 days, use 0 to never expire/evict.
nsup-period 120
# storage-engine memory # To use file storage backing, comment out the line above and use the
# following lines instead. storage-engine device {
file /opt/aerospike/data/test.dat
filesize 4G
data-in-memory true # Store data in memory in addition to file.
}
}Create an empty file named: _aerospike.sh.
We will start and run each container using a simple docker run command within this script
./_aerospike.sh 1
./_aerospike.sh 2
./_aerospike.sh 3
The variable PFROM will be initialised to 3000 and PTO variable will be set to 3003 if we run ./_aerospike.sh 1.
If we call ./_aerospike.sh 2 then PFROM will be 6000 and PTO will be 6003 and so on..
Finally we will call another script getServiceIpPort.sh to provide us with the service ports for the docker node.
#!/bin/bashPFROM=$(($1*3000))
PTO=$(($PFROM+3))docker run -d -v /Users/nareshmaharaj/Documents/aerospike/docker/docker-aerospike-cluster/aerospike$1:/opt/aerospike/etc/ --name aerospike$1 -p $PFROM-$PTO:3000-3003 aerospike:ee-5.6.0.5 --config-file /opt/aerospike/etc/aerospike.conf./**getServiceIpPort.sh** aerospike$1To make it easier, create a wrapper file.
Create a filed named _start.sh and add the following commands:
./_aerospike.sh 1
./_aerospike.sh 2
./_aerospike.sh 3By the way, the file getServiceIpPort.sh will dump out the ip and ports for each container.
Go ahead and create the file and add the following contents:
NAME=$1
echo [$1]: `docker exec -it ${NAME} asinfo -v service`
We need another script to join our nodes and form a cluster. This script creates a runtime docker variable and uses it in the Aerospike tip command to join a host to the cluster. Below we are joining host aerospike2 to host aerospike1, then host aerospike3 to host aerospike1
Create a file called _tip.sh with the following:
docker exec -e "AEROSPIKE2=$(docker inspect --format '{{ .NetworkSettings.IPAddress }}' aerospike2)" -ti aerospike1 asinfo -v 'tip:host=$AEROSPIKE2;port=3002'docker exec -e "AEROSPIKE3=$(docker inspect --format '{{ .NetworkSettings.IPAddress }}' aerospike3)" -ti aerospike1 asinfo -v 'tip:host=$AEROSPIKE3;port=3002'We may as well add a clean up script to remove everything once we are done testing:
Create a file called teardown.sh and add your docker cleanup commands:
docker rm -f aerospike1 aerospike2 aerospike3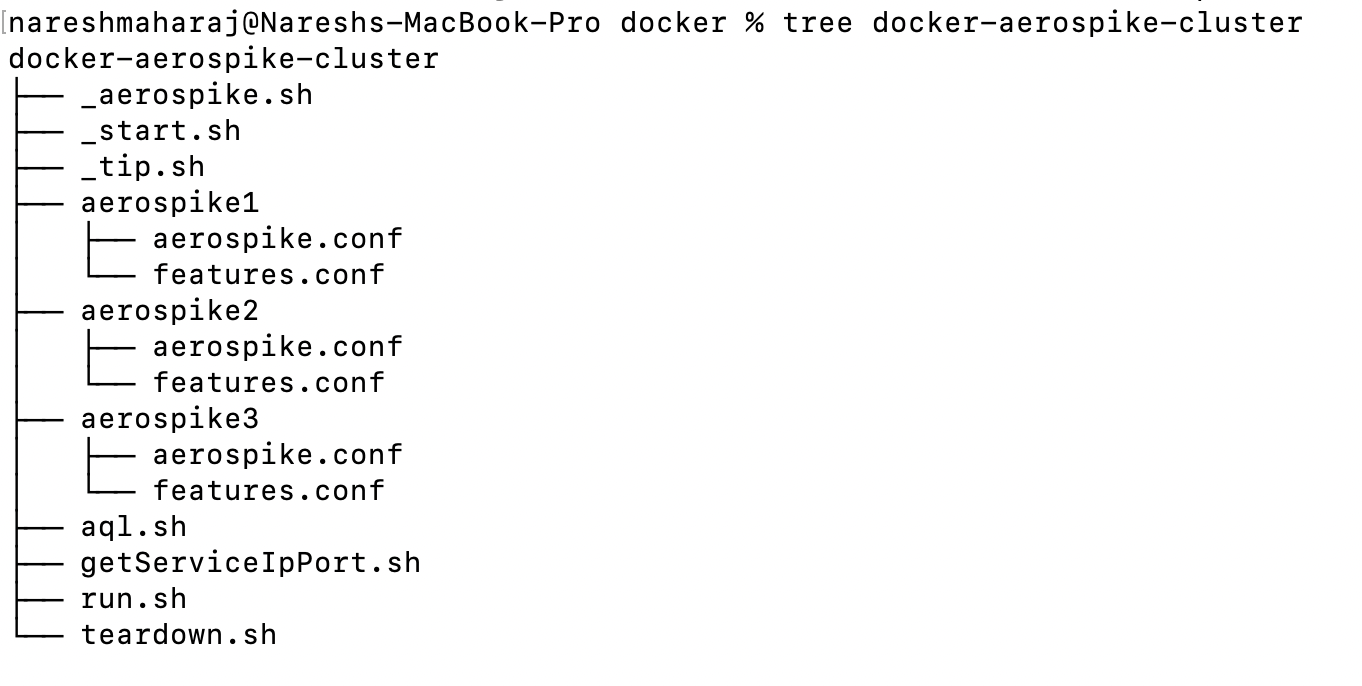
Step 2: Starting the Cluster
My final file called ./run.sh just calls
_start.sh
_tip.sh
You should see an output similar to the following after running ./run.sh.
Dont forget to chmod +x all executable files.
c9b167e0a6cc9cefb359fce529d167a4ff59c2525838844d630bb2c405c9dad9
[aerospike1]: 172.17.0.4:3000
5de31d77f392061e494e946f5a3bc0eeaa663d9c6a3d838f406ed99cfb41dc93
[aerospike2]: 172.17.0.5:300040119319270a7827e708cf8cfe4f53bf576e58a2b59f995b2cec622d01fa17bc
[aerospike3]: 172.17.0.6:3000ok
okRun docker ps | grep aerospike
nareshmaharaj@Nareshs-MacBook-Pro docker-aerospike-cluster % docker ps | grep aerospike40119319270a aerospike:ee-5.6.0.5 "/usr/bin/dumb-init …" About a minute ago Up About a minute 0.0.0.0:**9000**->3000/tcp, :::9000->3000/tcp, 0.0.0.0:9001->3001/tcp, :::9001->3001/tcp, 0.0.0.0:9002->3002/tcp, :::9002->3002/tcp, 0.0.0.0:9003->3003/tcp, :::9003->3003/tcp aerospike35de31d77f392 aerospike:ee-5.6.0.5 "/usr/bin/dumb-init …" About a minute ago Up About a minute 0.0.0.0:**6000**->3000/tcp, :::6000->3000/tcp, 0.0.0.0:6001->3001/tcp, :::6001->3001/tcp, 0.0.0.0:6002->3002/tcp, :::6002->3002/tcp, 0.0.0.0:6003->3003/tcp, :::6003->3003/tcp aerospike2c9b167e0a6cc aerospike:ee-5.6.0.5 "/usr/bin/dumb-init …" About a minute ago Up About a minute 0.0.0.0:**3000**-3003->3000-3003/tcp, :::3000-3003->3000-3003/tcpCheck all nodes are present in the cluster.
docker exec -it aerospike1 asadm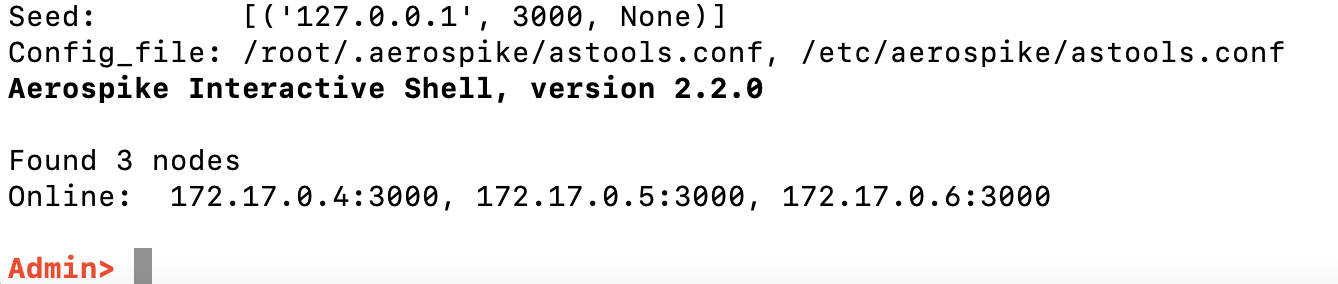
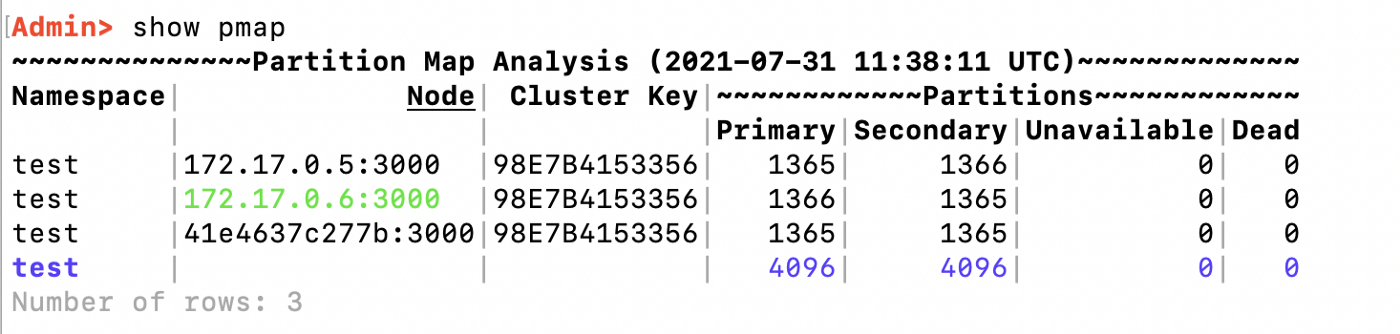
Run the pmap command to show the partition distribution. Notice how the Primary and Secondary partitions are nicely balanced.
Step 3: Add Rack-IDs to the Partitions in the Cluster
./teardown.shEdit each aerospike.conf and under line 66 add the following:
For nodes aerospike1 and aerospike2 add
rack-id 1
For node aerospike3 add
rack-id 2
Example:
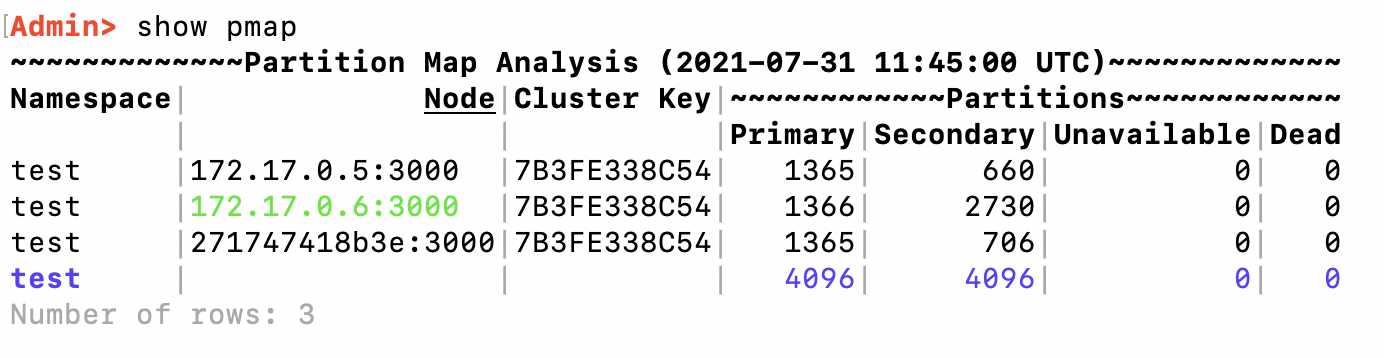
Restart cluster and run the show pmap command.
You will now see the imbalance of the secondary partitions as node 3 has to cater for potentially rack-id 1 going down.
Hence 2730 + 1366 = 4096 partitions for node 3 ( 172.17.0.6 )
./run.sh docker exec -it aerospike1 asadm
Found 3 nodesOnline: 172.17.0.4:3000, 172.17.0.6:3000, 172.17.0.5:3000
Admin> show pmap